To run an identity verification via the White-label Forms, first you need to configure your White-label Forms in the Settings section of the bronID Portal.
Step 1: In the bronID Portal, go to Settings -> Developers ->API keys and follow the instructions on this link to configure your Service UUID.
Step 2: Go to Settings -> Whitelabel forms -> Configuration and follow the instructions on this link to configure your Forms.
Step 3: Once your Forms are configured, you can access them via your unique link https://preview.bronid.com/idform/[mysevicename]
When running an identity verification of an individual (KYC), you can get two types of results, Verified or Rejected. The default rule-set that bronID uses to process identity verification is Safe Harbour. You can find more information about the interpretation of the results achieved with Safe Harbour on the following link.
To achieve any of the outcomes in the bronID test environment, Verified or Rejected, you must follow the scenarios described in the table below:
Examples:
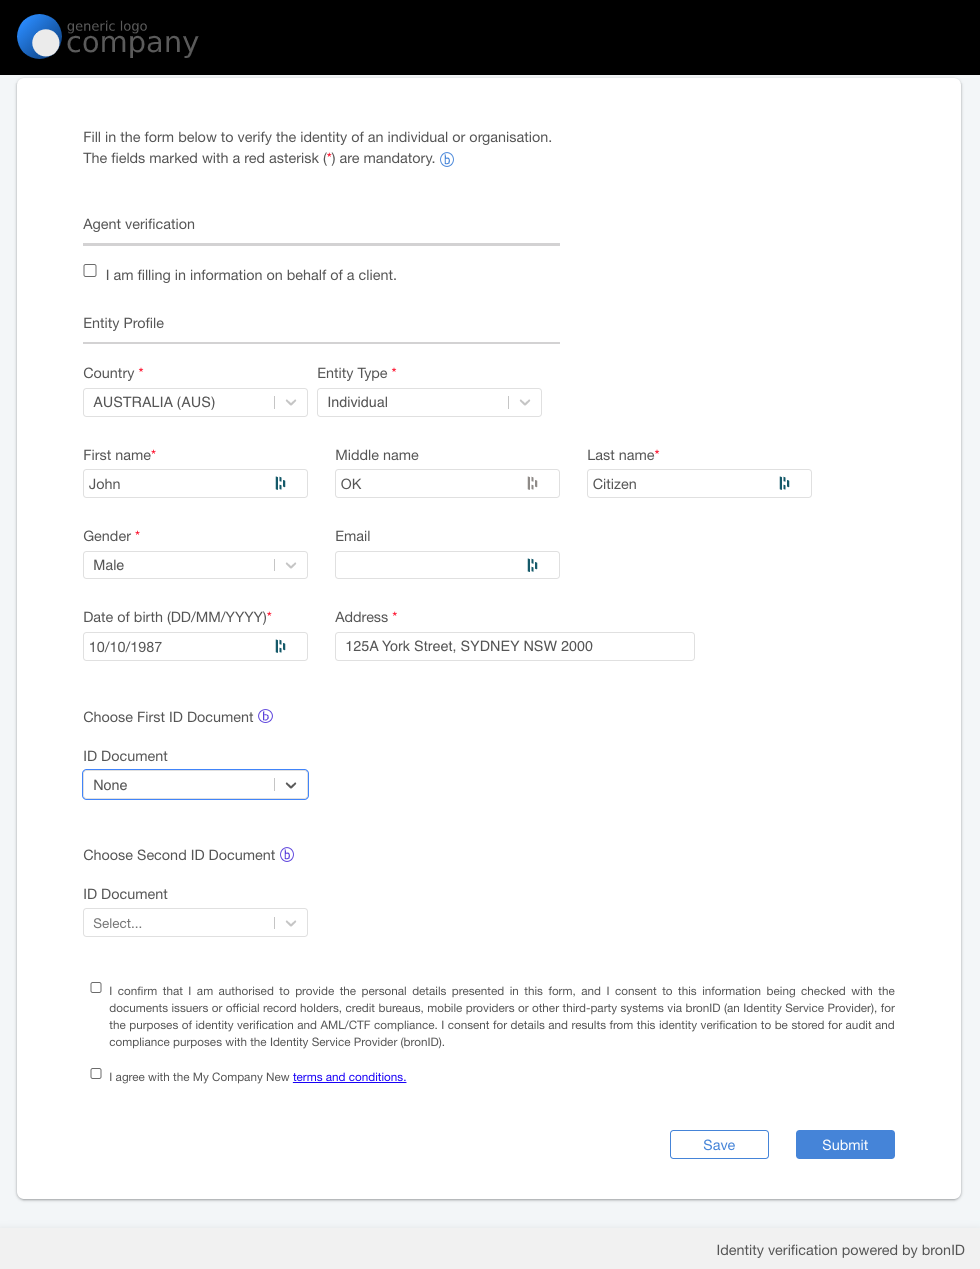
Verified (does not appear on a watchlist): John OK Citizen, 10/10/1987, 125A York Street, SYDNEY NSW 2000
Verified (appears on a watchlist): John PEP Citizen, 10/10/1987, 125A York Street, SYDNEY NSW 2000
Rejected: John Citizen, 10/10/1987, 125A York Street, SYDNEY NSW 2000
Run a test verification
Step 1: Go to the form link: https://preview.bronid.com/idform/[mysevicename].
Step 2: Choose the country of residence. The bronID Portal will automatically display the data collection form specific to the selected country.
Step 3: Complete the form using the data format provided in the table above to achieve the desired outcome of "Verified" or "Rejected." Please refrain from using real values for testing purposes.
Step 4: Optionally, provide ID document information, depending on the available data sources of the country.
Step 5: Grant consent for processing the supplied information by checking the consent checkbox.
Step 6: Access the results in the bronID Portal by navigating to KYC>Results>Individual.