You can additionally configure webhooks. They can be used to automatically receive real-time updates from bronID. Webhooks are triggered by a certain event, such as a verification status change. When that event occurs, bronID will make an HTTP request to the URL configured for the webhook. You can configure your system to automatically take certain actions when receiving the webhooks (e.g. approve the customer when the ID verification is finished).
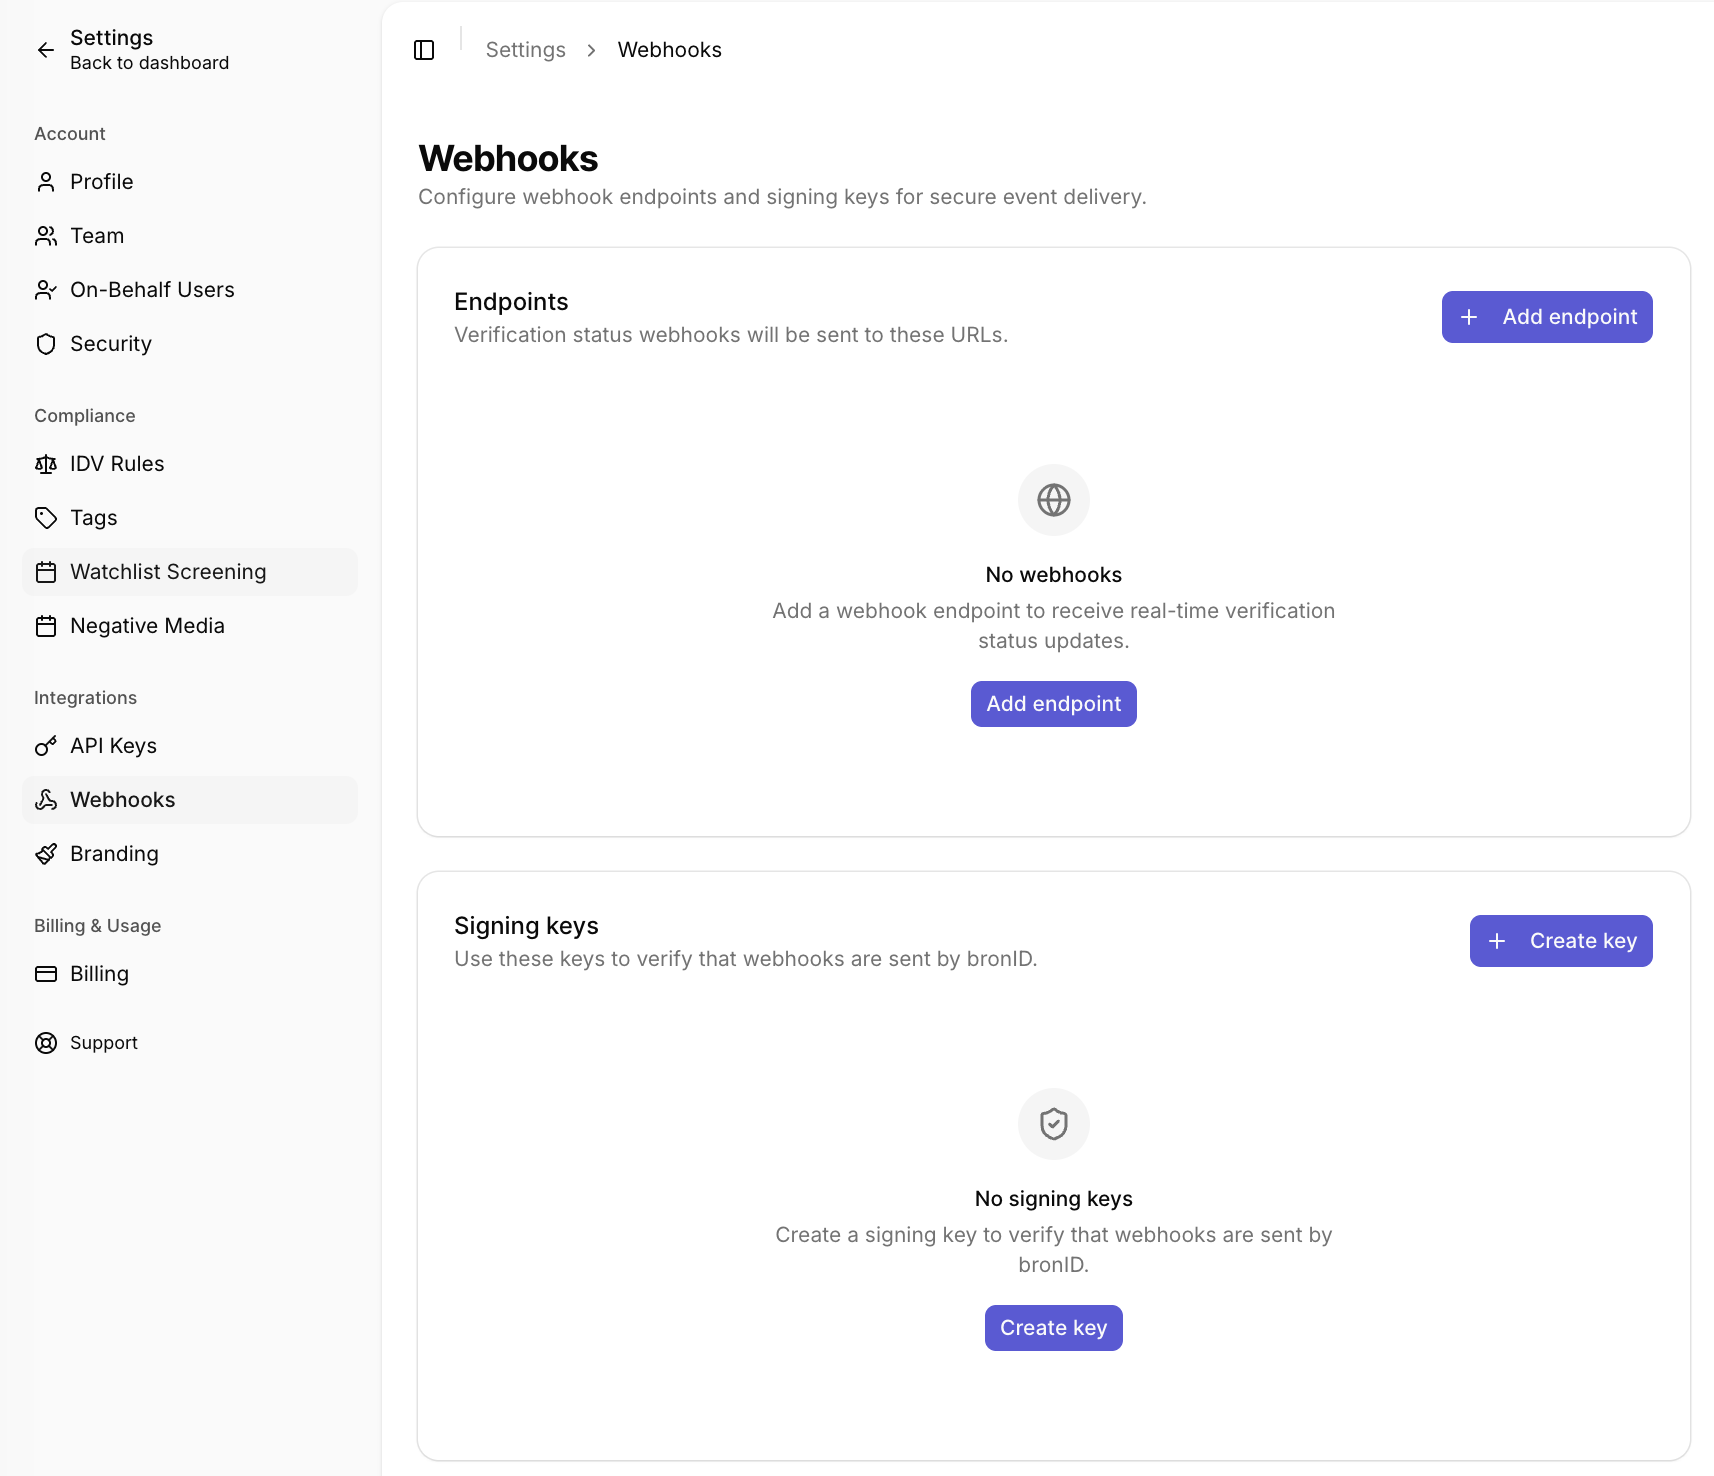
To configure the webhooks, follow the steps below:
- Log into your bronID Portal account.
- Open Settings from the left-hand menu.
- Under Integrations, select Webhooks.
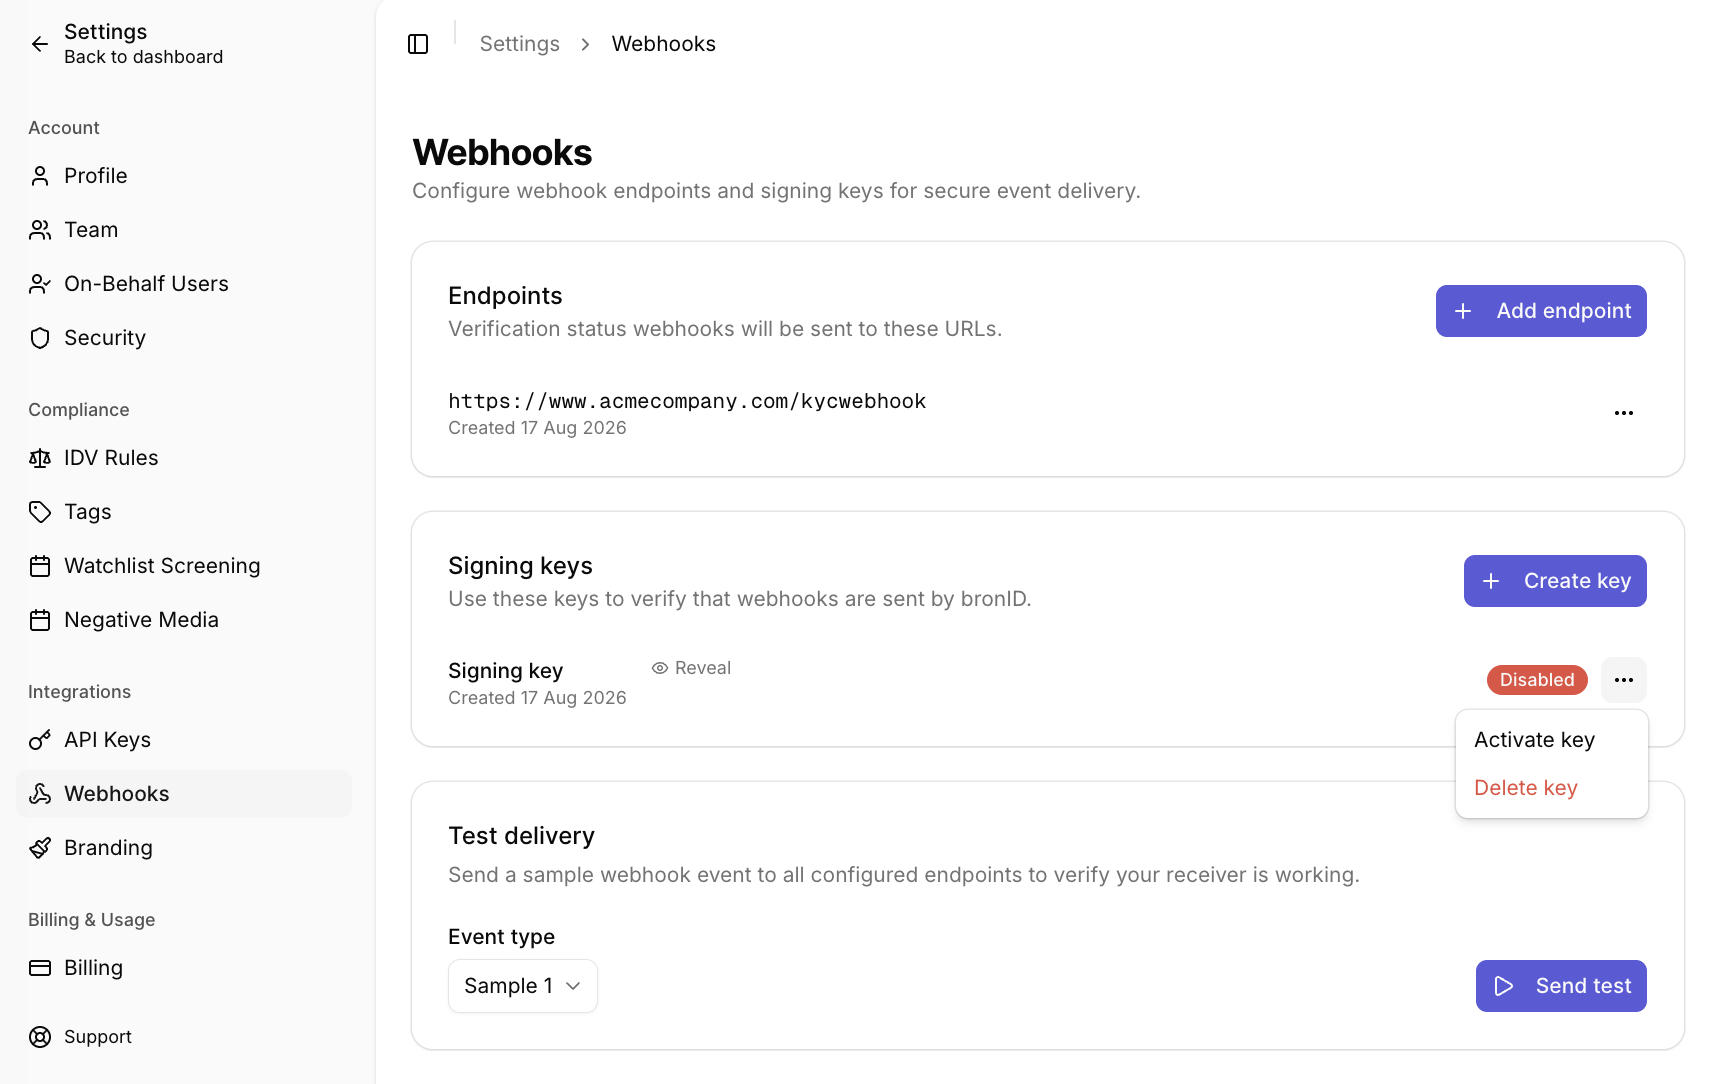
- Add a webhook endpoint. In the Endpoints section, click Add endpoint and enter your webhook endpoint (listener) URL (e.g. https://www.acmecompany.com/kycwebhook). The verification status webhooks will be sent to this URL. Once added, the endpoint will appear in the list with its creation date, and you can manage it using the menu on the right.
- Create a signing key. In the Signing keys section, click Create key. You should use this key to verify that webhooks are sent by bronID. Click Reveal to view the key value. Each signing key has a status (e.g. Active or Disabled), and you can manage it using the menu on the right, which allows you to Activate key (or disable it) and Delete key.
- Test your webhook delivery. In the Test delivery section, select an Event type from the drop-down menu and click Send test. This sends a sample webhook event to all configured endpoints so you can verify that your receiver is working correctly.