

If you have subscribed to the bronID Integrated option (Portal + Integration), you need to generate your API keys to be able to use the API or the Whitelabel forms. To do this, follow the steps below. Please note that each step opens up once the previous step has been completed.
- Log into your bronID Portal account.
- Open Settings from the left-hand menu.
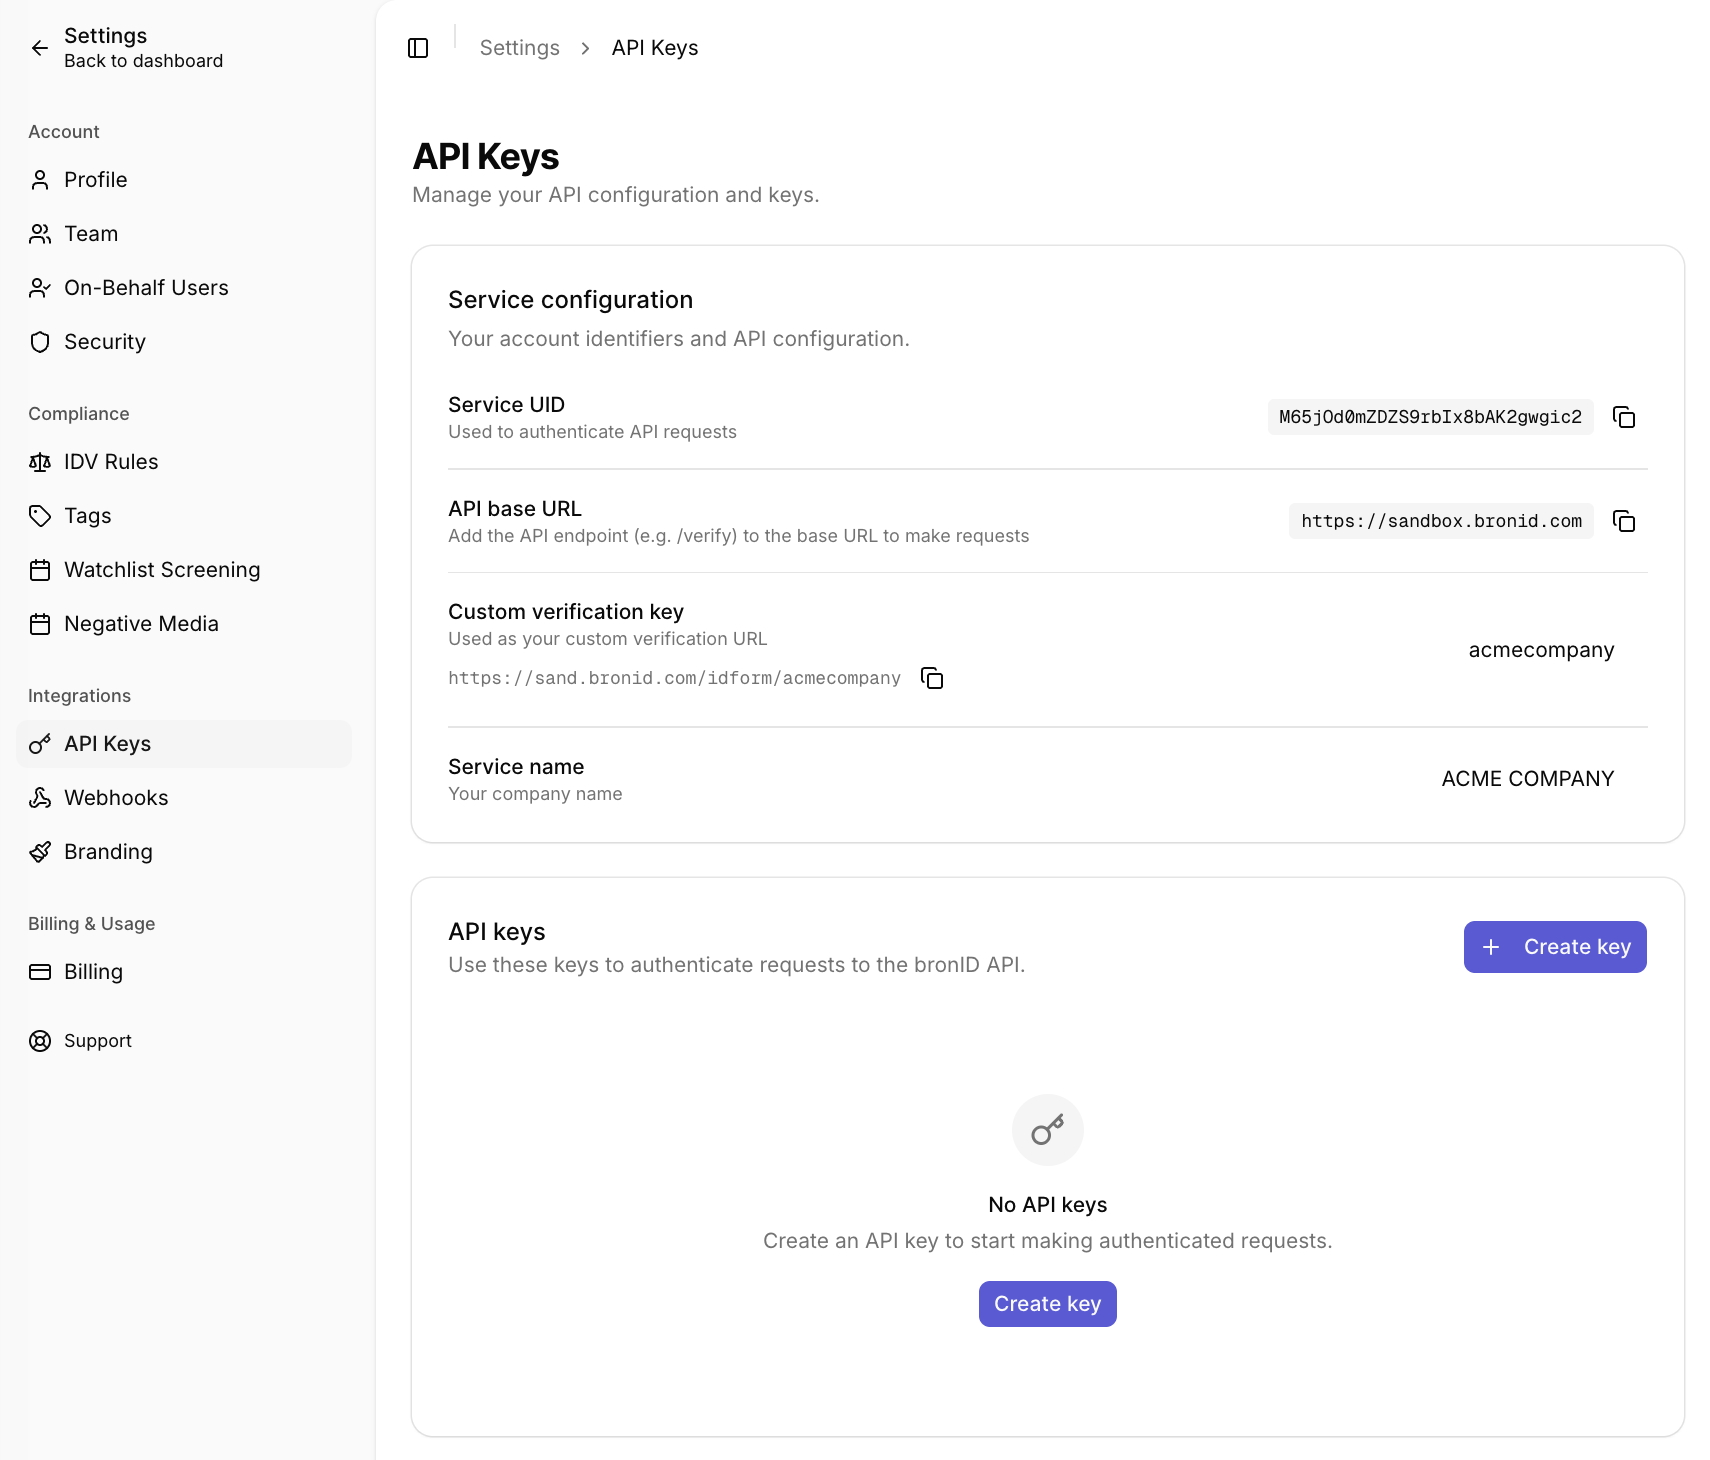
- Under Integrations, select API Keys.
- Review the Service configuration section. Here you will find your account identifiers and API configuration:
- Service UID: Used to authenticate API requests
- API base URL: Add the API endpoint (e.g. /verify) to the base URL to make requests
- Custom verification key: Used as your custom verification URL, where your customers can submit KYC verifications. Add something to identify the your company in the forms URL e.g. acmecompany
- Service name: The name of your business or service as it will be shown to your customers when they access the KYC forms (e.g. ACME COMPANY).
- Generate your API keys. In the API keys section, click Create key. These keys should be kept secret as they can be used to submit KYC verifications.
- Access the API documentation. Once you have generated your API keys, you can access the API documentation. This will provide you with detailed information on how to use the bronID API to submit KYC verifications.
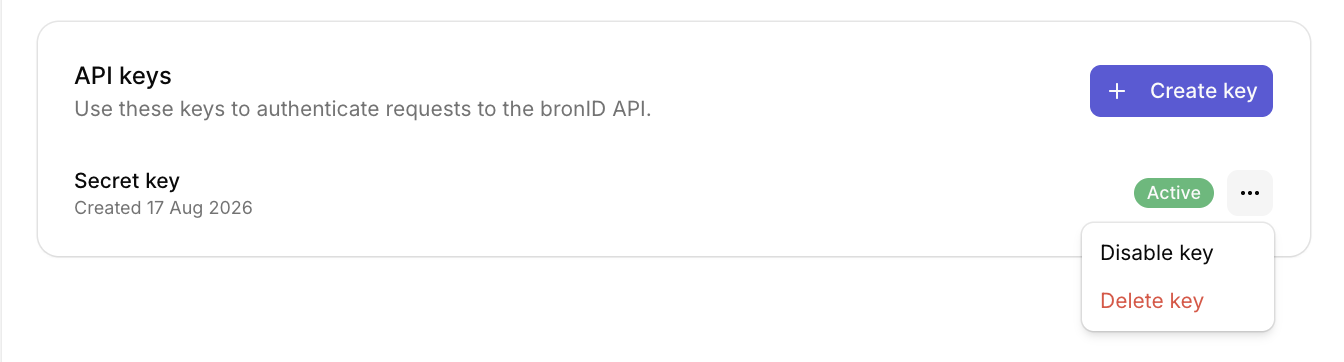
Once a key has been created, it will appear in the list with its creation date and status (e.g. Active). You can manage each key using the menu on the right, which allows you to Disable key or Delete key.
Remember to keep your API keys secret and use them carefully. Never share them publicly. You can access the API documentation to learn more about how to use the bronID API.


